Apr 5, 2024
Combining Salesforce and Tableau for Advanced Analytics– Exploring Einstein AI and Advanced Analytics-1
To give an example of how you might combine Tableau and Salesforce to achieve advanced analytical use cases, we will bring the Einstein Discovery prediction model that you created in Chapter 8, Blending Tableau with Traditional CRM Analytics into Tableau Desktop. If you have not already completed the setup of this Einstein Discovery model, now is the time to do so.
We will employ the Tableau Einstein Discovery connector to bring the predictions into our Tableau environment, and thereby we will learn one of the most important ways of combining CRM Analytics with Tableau Desktop to get more out of both.
To start with, let us get the connection set up. Please follow the steps below to set up the connection between Tableau Desktop and Einstein Discovery:
- Go to your model from Chapter 8 in Analytics Studio. It can be reached via Browse |Models, as shown in Figure 9.1:
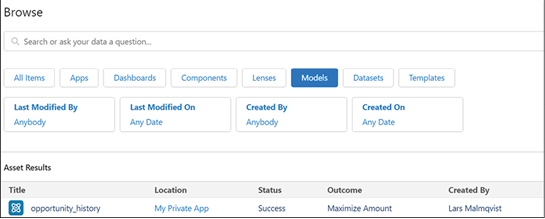
Figure 9.1: Deploy model screen in Analytics Studio
- Now open your model and deploy it by clicking Deploy Model; this will make it usable from Tableau Desktop, among other places. You can see this in the Figure 9.2:
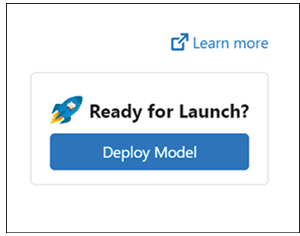
Figure 9.2: Model deployment options
- Leave the defaults as is and ignore any model warnings; they are not relevant to the example. See the warning in the Figure 9.3:
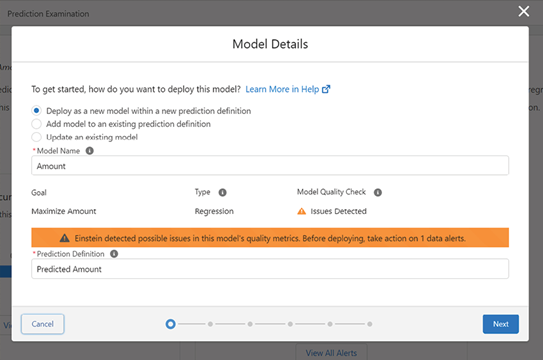
Figure 9.3: Ignore warnings
- On the following screen, select Deploy without connecting to a Salesforce object, as we are not writing back to the CRM but using it from Tableau. You can see this in Figure 9.4:
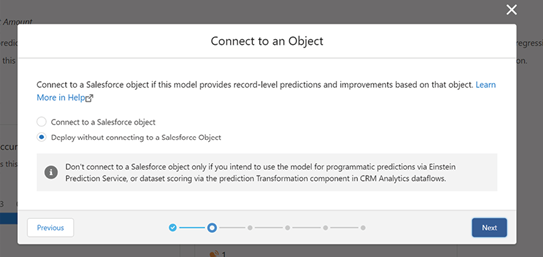
Figure 9.4: Deployment settings
- We will not be segmenting our data, although it is worth noting this capability for future investigation, so select Don’t segment, as shown in Figure 9.5:
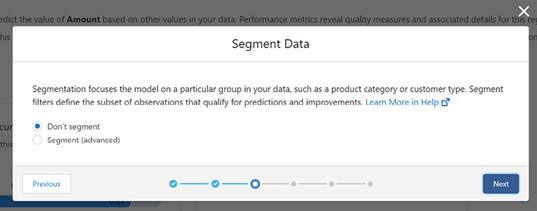
Figure 9.5: Segmentation options
- Under Actionable variables, indicated in Figure 9.6, select Lead Source and Industry” as these are within our gift to influence, although not fully control.
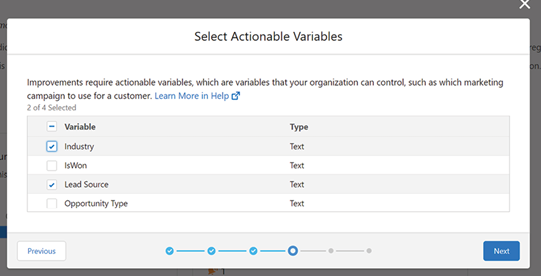
Figure 9.6: Actionable variables
- At this point, we will not customize our predictions. Therefore, select Don’t customize, as shown below.
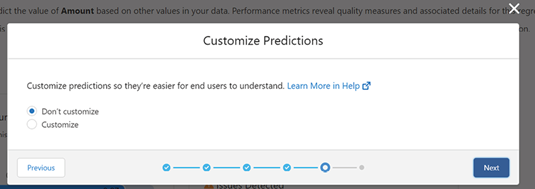
Figure 9.7: Customization options
- Click Deploy to deploy the model, as shown in Figure 9.8:
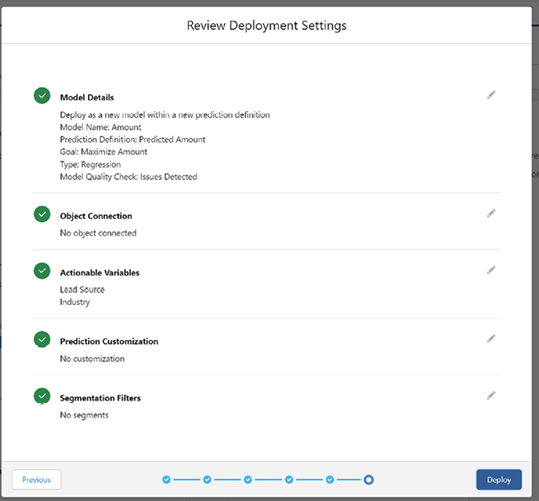
Figure 9.8: Deploy model
- When you are redirected to a screen as shown Figure 9.9, you are ready to proceed to the next stage.
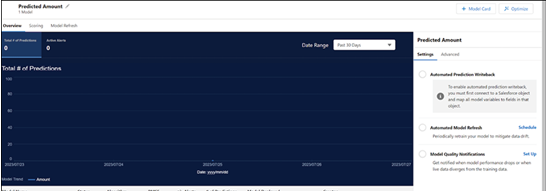
Figure 9.9: Model deployed
More Details