Jul 5, 2023
Using the Tableau online output connection – Blending Tableau with Traditional CRM Analytics
The Tableau Online Output Connector is a powerful tool that enables you to seamlessly push your prepared data from CRM Analytics into Tableau Online for further analysis. By transforming, merging, and cleaning your data in CRM Analytics, you can easily create a .hyper file that can be analyzed using Tableau Online’s advanced analytics tools. This connector is designed to work with Data Prep recipes and requires a Creator license for the Tableau Online account. In this section, we will walk you through the process of enabling the Tableau Online Output Connector, configuring connection settings, and pushing data to Tableau Online.
In this example, we will write the opportunity_history dataset that we have been using all through this chapter to our Tableau Cloud environment, using the Tableau Online Output Connector.
To do so follow the instructions below:
- First, go to setup and search for analytics in the Quick Find box. Click Settings.
- Under settings, shown in the following screenshot, enable the Tableau Online output connection and save:
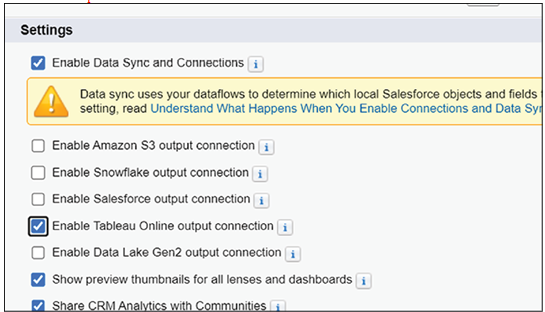
Figure 8.39: Analytics settings showing Tableau connector
- Go to Analytics Studio and click Data Manager, then from the page that appears, click Connections. This should look like the following screenshot:
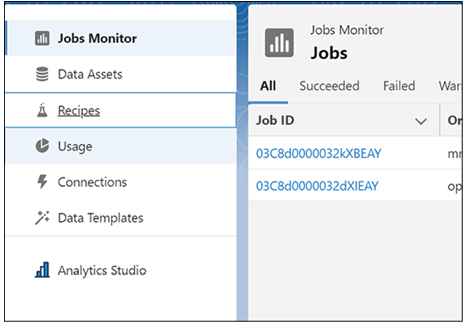
Figure 8.40: Data manager showing connections
- Click New Connection, select Output under Connector Type and click Tableau Online Output Connector, as shown below:
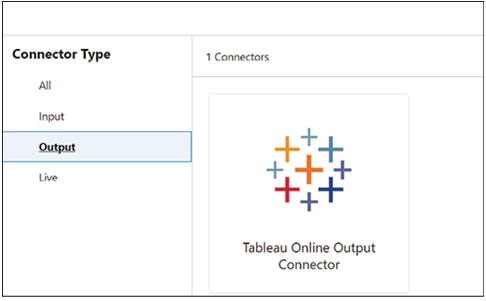
Figure 8.41: New connection dialogue
- Now fill in the information as in the screenshot below. You can refer to this URL for the details of the parameters if needed: https://help.salesforce.com/s/articleView?id=sf.bi_integrate_connectors_output_tableau_hyper.htm&type=5
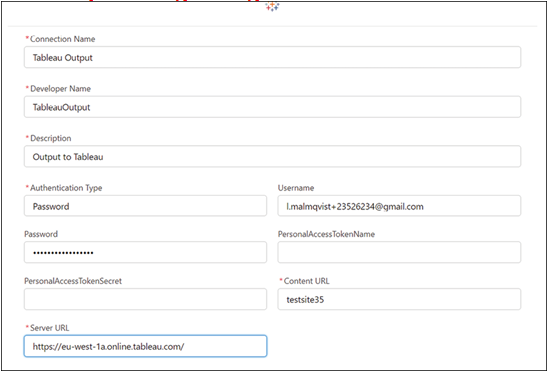
Figure 8.42: Tableau Online connector configuration
- Now you have established the connection. Time to test it. To do so, go back to Data Manager and click on Recipes, as shown in the following screenshot:
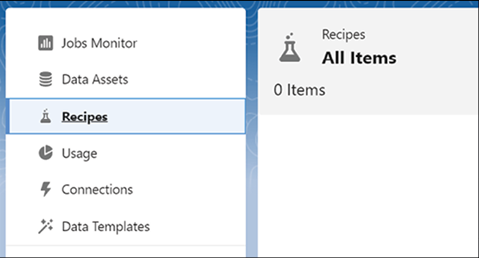
Figure 8.43: Data manager recipes tab
- On the Canvas that appears, click Add Input Data, shown in the following screenshot:
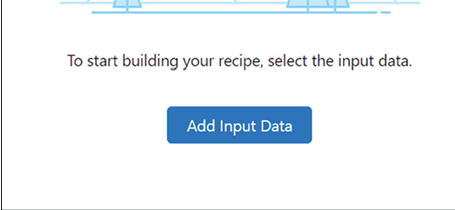
Figure 8.44: Add input data button
- Select the opportunity_history dataset, as shown in the following figure:

Figure 8.45: opportunity_history dataset selected as input
- Now add a node by clicking on “+”. Select Output, shown below:
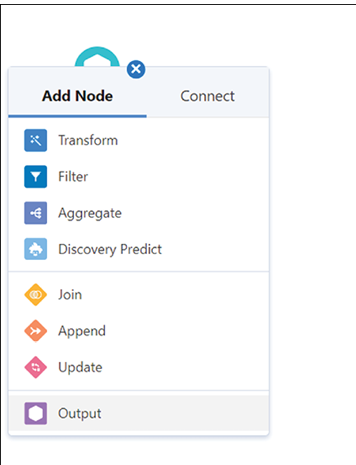
Figure 8.46: Output node being added
- Fill out the form as per the screenshot below:
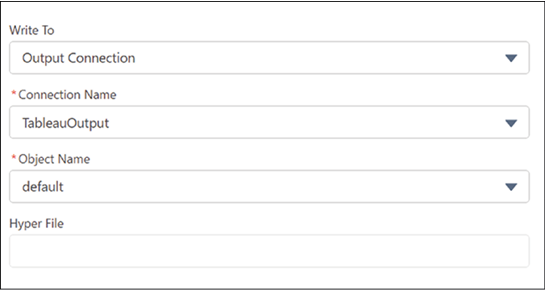
Figure 8.47: Output node configuration
- Save and Run the Recipe by clicking on the button and giving it a name, for instance as in the following screenshot:
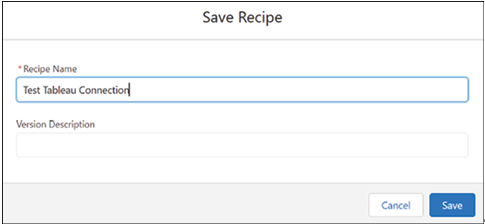
Figure 8.48: Save and run recipe dialogue
- The job will now run, so wait until it has been completed. You can monitor this in Jobs Monitor, shown in Figure 8.49:

Figure 8.49: Jobs monitor showing recipe run
When the job is complete, you can find and explore the dataset in Tableau Cloud by clicking Explore, selecting default, and then clicking on Extract, which is the extract you have just created. This will look as in the following screenshot:
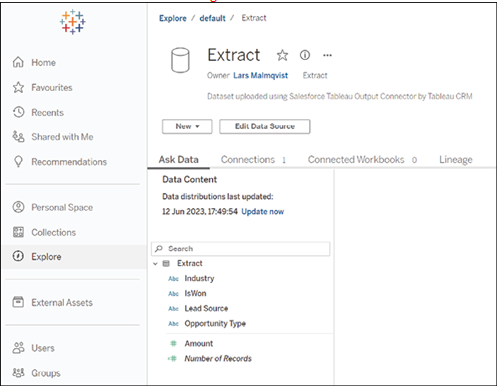
Figure 8.50: Explore dataset in Tableau dialogue
We have now covered the material for this chapter. Well done! However, we have even further heights to scale as we explore the world of advanced analytics in Chapter 9 – Exploring Einstein AI and Advanced Analytics.
