May 3, 2023
Creating an Einstein Discovery Model and using it from CRM Analytics – Blending Tableau with Traditional CRM Analytics
Einstein Discovery, a cutting-edge machine learning platform developed by Salesforce, is designed to bring transparent predictions and recommendations to users within Tableau workflows and in Salesforce CRM. This powerful tool enables data scientists, analysts, and business users to create predictive models without writing any algorithms. With its intuitive, no-code environment, Einstein Discovery empowers individuals and organizations to make smarter, more informed decisions guided by ethical and transparent AI.
In this section, we will create an Einstein Discovery model based on our opportunity history data and investigate it within CRM Analytics. In Chapter 9 – Exploring Einstein AI and Advanced Analytics, we will examine how to use this model from within Tableau.
To create a model and investigate its parameters, use the following steps:
- Go to Analytics Studio and click Create | Model, as demonstrated in the following screenshot.
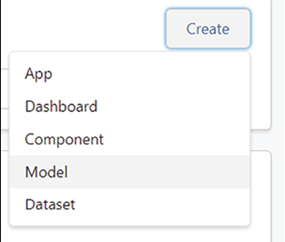
Figure 8.28: Model creation dialogue
- Choose Create from Dataset in the dialogue that appears, shown below:
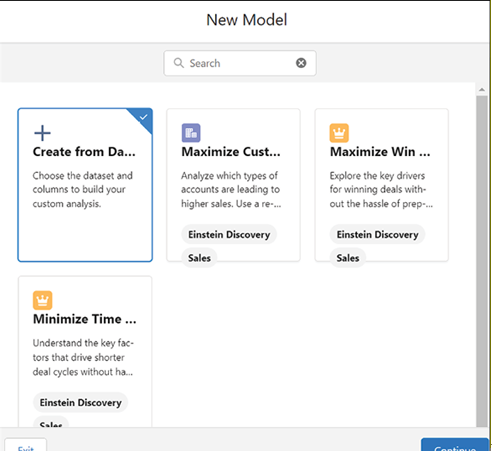
Figure 8.29: Create from dataset dialogue
- Now select the opportunity_history dataset that we have previously created, as indicated in the following screenshot:
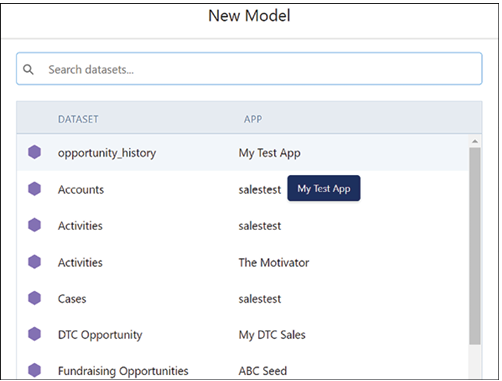
Figure 8.30: opportunity_history dataset selected
- As the goal, follow the settings in the following screenshot to maximize the amount of the opportunity:
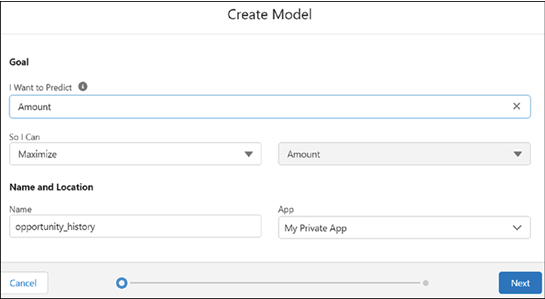
Figure 8.31: Model goal configuration
Einstein Discovery allows for considerable freedom in manually configuring the model that you want. However, for the purposes of this exercise, we will simply allow it to make the decisions itself. Therefore, select Automated in the Configure Model Columns dialogue. Note that this does mean we will take into account whether the opportunity was won or not, which you may want to exclude in a real scenario. However, in this scenario, the influence is not huge, so keeping it in does not materially change the result. You can see this in the following screenshot:
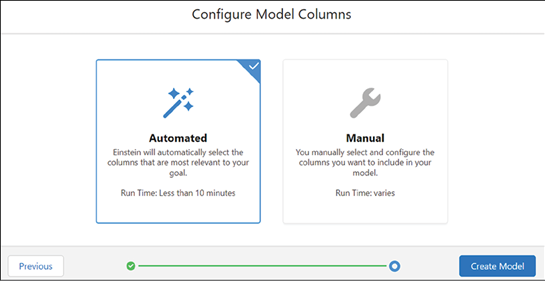
Figure 8.32: Automated configuration selected
The system will now build your model, which usually takes 5 to 10 minutes. When it is done, you should see the following overview. You can check the alert and also note that at the highest level, shown in the screenshot below, the model’s prediction seems fairly good.
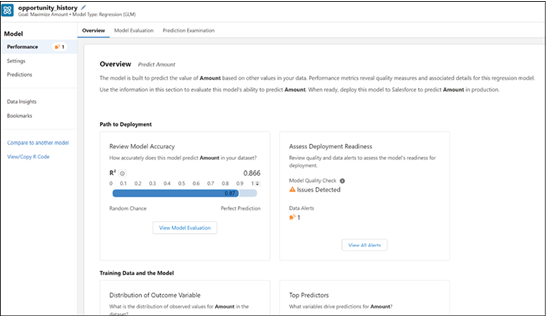
Figure 8.33: Model overview showing performance
If you now click on the Model Evaluation tab, you can see more detail about the model performance. This is shown in Figure 8.34:
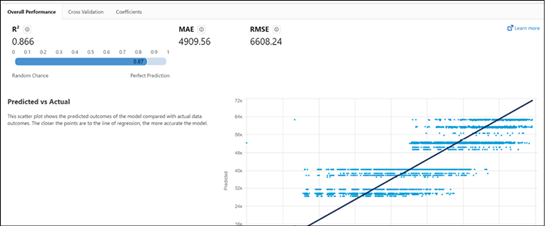
Figure 8.34: Model evaluation report
It is also worth going into the Model Coefficients tab, shown below, where you can see the most important variables in the model for predicting the opportunity amount.
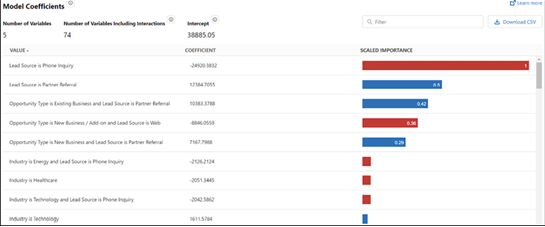
Figure 8.35: Model coefficients tab
Now go into the Prediction Examination tab, shown in the following screenshot, where you can see how the model classified actual data from the training dataset. This can give you a good sense of how it will work in practice.

Figure 8.36: Prediction examination tab
On the Data Insights tab, shown in Figure 8.37, accessible from the sidebar, you get an overview of what factors play the biggest role in making the amount high or low.
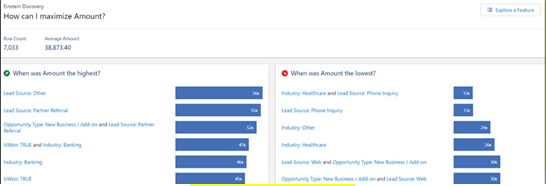
Figure 8.37: Data insights overview
Finally, on the Predictions tab, shown in Figure 8.38, you can actually test out different values and see what the model predicts.
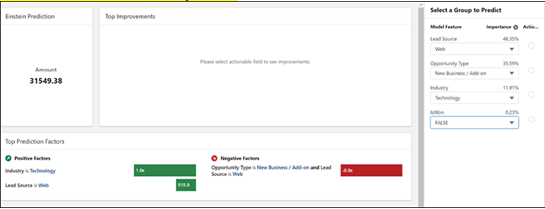
Figure 8.38: Predictions tab
Have a good play with the different aspects of the model, and now, we will move on to look at the Tableau Online Output Connection.
