Dec 30, 2021
Setting up SSO between Salesforce and Tableau Online – Integration, Authentication, and Tableau Viz LWC
When you embed dashboards from Tableau Online in Salesforce, you will normally have to log in with your Tableau credentials to see the dashboard, which can be quite annoying to users in the long run. To avoid this, you have the option of setting up SSO between the two environments.
This is a complex process, but worth the effort. To set up a SSO between your organization and Tableau Online, you follow these broad steps:
- Configure your organization as an identity provider in Salesforce.
- Adjust SAML settings in Tableau Online.
- Create a connected app in Salesforce to integrate with Tableau Online.
- Manage access to the connected app in Salesforce.
- Download and apply the identity provider metadata from Salesforce in Tableau Online.
- Test the SSO configuration by launching the application.
As there is no substitute for hands-on practice, let us dive in and set this up: - First, we need to configure Salesforce as an IdP. To do this, navigate to Identity Provider in Setup, as shown in the next screenshot:
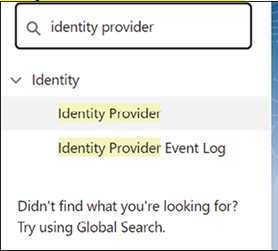
Figure 7.23: Identity Provider section in Setup
- Click Enable Identity Provider, shown in the screenshot below, to enable your Salesforce org for identity:
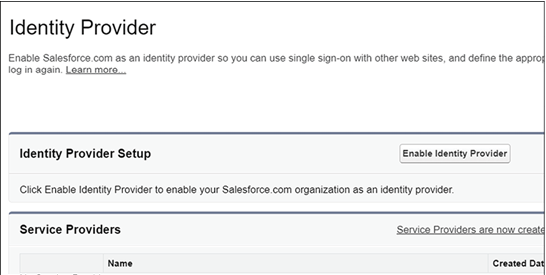
Figure 7.24: Enabling Identity Provider
- Select the default certificate and click Save, as shown in Figure 7.25. Click Ok in the popup.
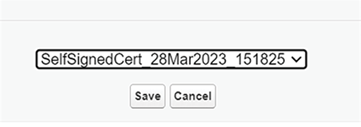
Figure 7.25: Selecting the certificate
- Your org is now enabled as an identity provider. Click Download Metadata, as shown in Figure 7.26, and save the file somewhere to get to it later.
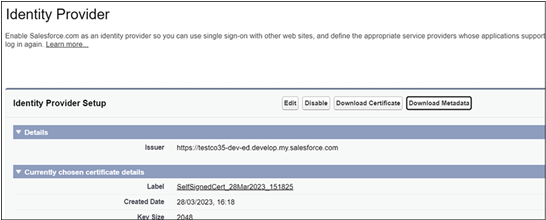
Figure 7.26: Downloading metadata file
The second step involves enabling your Tableau Online site for SSO. You do this by following these steps:
- Log into your Tableau Online account.
- Navigate to Settings | Authentication, as shown in the following screenshot:

Figure 7.27: Authentication section in Tableau Online
- Click SAML and then Edit Connection. Then copy the two URLs Tableau Cloud entity ID and Assertion Consumer Service URL (ACS) to a text file. You will need these later.
Now you will need to create a connected app in Salesforce for Tableau Cloud: - First, navigate to App Manager in Setup, as shown in the screenshot below.

Figure 7.28: App Manager in Setup
- Click New Connected App at the top right.
- Now fill in the values carefully, as in Figure 7.29. Replace the start URL with the URL for your own Tableau Cloud site and Entity ID and ACS UR with the values you previously copied to a text file.
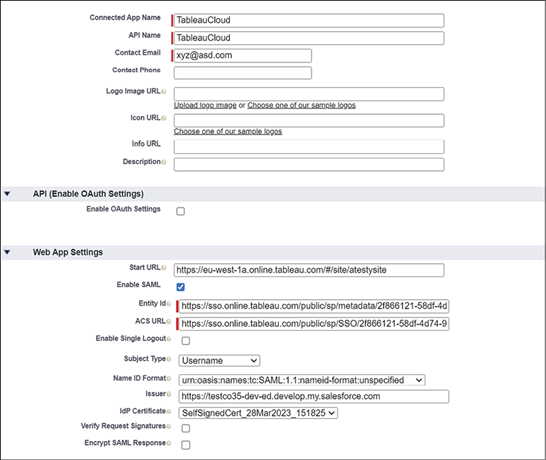
Figure 7.29: New Connected App configuration
Now you need to return to Tableau Cloud and import the Salesforce metadata:
- Navigate to Settings |Authentication, expand Edit connection and go to Step 4.
- Pick the metadata file you downloaded previously and click Apply as shown below:
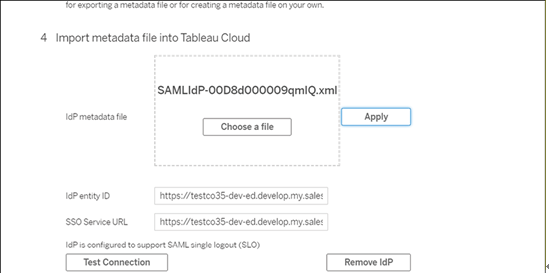
Figure 7.30: Importing Salesforce metadata file
- In Step 6, select Authenticate using an inline frame, shown in the screenshot below:

Figure 7.31: SAML configuration option
- Under Default Authentication Type for Embedded Views pick SAML, as shown in Figure 7.32:
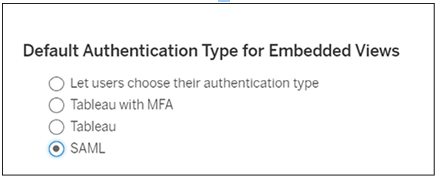
Figure 7.32: Default authentication type
- Now you can save.
To work, the username (email) of the users using SSO must match between Salesforce and Tableau. So if you have not used the same username on the two systems, you will need to create matching user accounts on either or both systems to make the SSO work. Once you have done that, it will work.
Note that there is now also an option of simply using Salesforce directly for authentication, which is easier to set up, but less general in its applicability. The method we have been through will work with any SAML-based IdP not just Salesforce.
