Dec 30, 2021
Setting up SSO between Salesforce and Tableau Online – Integration, Authentication, and Tableau Viz LWC

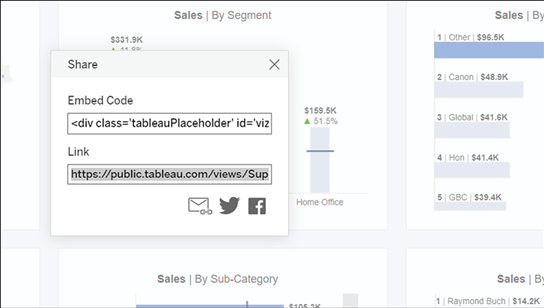
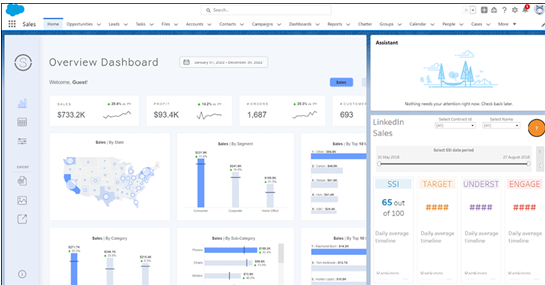
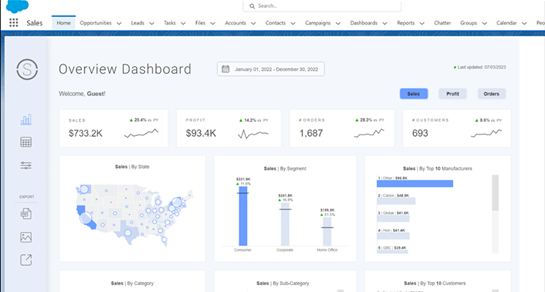
When you embed dashboards from Tableau Online in Salesforce, you will normally have to log in with your Tableau credentials to see the dashboard, which can be quite annoying to users in the long run. To avoid this, you have the option of setting up SSO between the two environments.
This is a complex process, but worth the effort. To set up a SSO between your organization and Tableau Online, you follow these broad steps:

  1. Configure your organization as an identity provider in Salesforce.
  2. Adjust SAML settings in Tableau Online.
  3. Create a connected app in Salesforce to integrate with Tableau Online.
  4. Manage access to the connected app in Salesforce.
  5. Download and apply the identity provider metadata from Salesforce in Tableau Online.
  6. Test the SSO configuration by launching the application.
    As there is no substitute for hands-on practice, let us dive in and set this up:
  7. First, we need to configure Salesforce as an IdP. To do this, navigate to Identity Provider in Setup, as shown in the next screenshot:

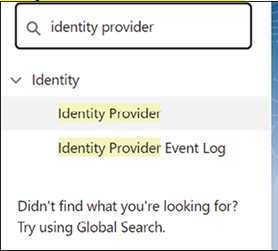
Figure 7.23: Identity Provider section in Setup

  1. Click Enable Identity Provider, shown in the screenshot below, to enable your Salesforce org for identity:

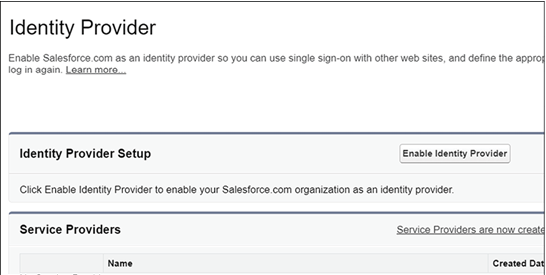
Figure 7.24: Enabling Identity Provider

  1. Select the default certificate and click Save, as shown in Figure 7.25. Click Ok in the popup.

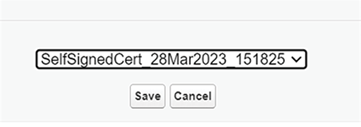
Figure 7.25: Selecting the certificate

  1. Your org is now enabled as an identity provider. Click Download Metadata, as shown in Figure 7.26, and save the file somewhere to get to it later.

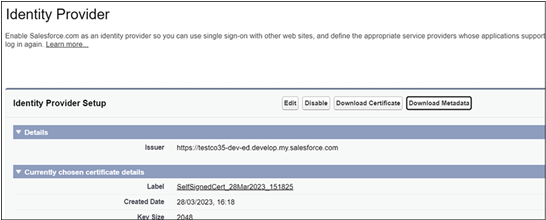
Figure 7.26: Downloading metadata file
The second step involves enabling your Tableau Online site for SSO. You do this by following these steps:

  1. Log into your Tableau Online account.
  2. Navigate to Settings | Authentication, as shown in the following screenshot:

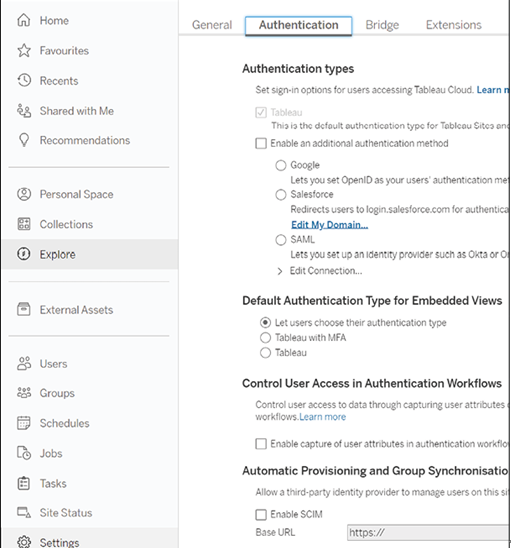
Figure 7.27: Authentication section in Tableau Online

  1. Click SAML and then Edit Connection. Then copy the two URLs Tableau Cloud entity ID and Assertion Consumer Service URL (ACS) to a text file. You will need these later.
    Now you will need to create a connected app in Salesforce for Tableau Cloud:
  2. First, navigate to App Manager in Setup, as shown in the screenshot below.

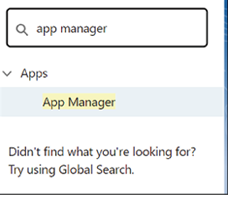
Figure 7.28: App Manager in Setup

  1. Click New Connected App at the top right.
  2. Now fill in the values carefully, as in Figure 7.29. Replace the start URL with the URL for your own Tableau Cloud site and Entity ID and ACS UR with the values you previously copied to a text file.

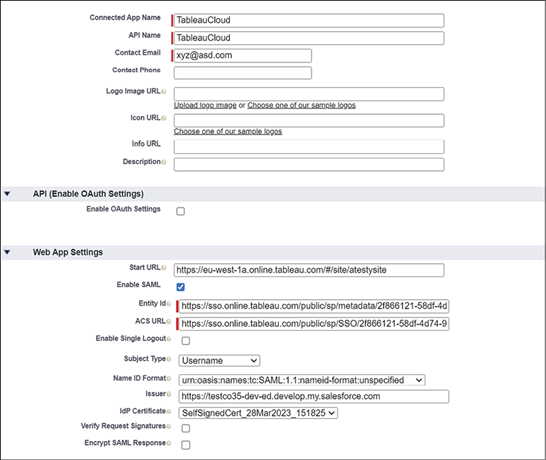
Figure 7.29: New Connected App configuration
Now you need to return to Tableau Cloud and import the Salesforce metadata:

  1. Navigate to Settings |Authentication, expand Edit connection and go to Step 4.
  2. Pick the metadata file you downloaded previously and click Apply as shown below:

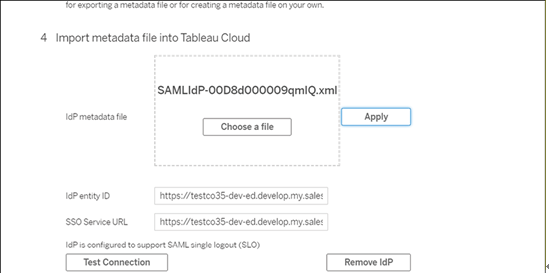
Figure 7.30: Importing Salesforce metadata file

  1. In Step 6, select Authenticate using an inline frame, shown in the screenshot below:

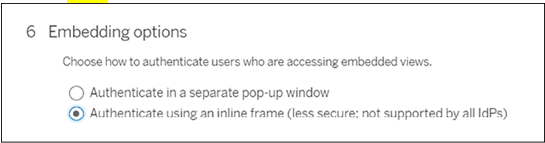
Figure 7.31: SAML configuration option

  1. Under Default Authentication Type for Embedded Views pick SAML, as shown in Figure 7.32:

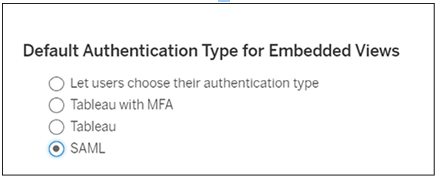
Figure 7.32: Default authentication type

  1. Now you can save.
    To work, the username (email) of the users using SSO must match between Salesforce and Tableau. So if you have not used the same username on the two systems, you will need to create matching user accounts on either or both systems to make the SSO work. Once you have done that, it will work.
    Note that there is now also an option of simply using Salesforce directly for authentication, which is easier to set up, but less general in its applicability. The method we have been through will work with any SAML-based IdP not just Salesforce.
More Details
Nov 25, 2021
Advanced filtering – Integration, Authentication, and Tableau Viz LWC

For more control over filtering the Tableau visualization on a record page, you can establish a mapping between a Tableau field and a Salesforce field. The Tableau field should be present in the embedded visualization, while the Salesforce field must be a qualified field on the embedding page. The Tableau Lightning Web Component filters the Tableau visualization automatically when these field values match.
To evaluate this filtering, add the Tableau Visualization component to a record page. For example, insert a sales-related Tableau visualization onto your opportunity record pages.
Let us try an example:

  1. In your Salesforce organization, access the App Launcher, select Sales, and click the Accounts tab, like in the following screenshot:

Figure 7.19: Accounts tab in Sales app

  1. Choose an account from the All Accounts list, it does not matter which.
  2. Click the Setup gear and select Edit Page, as shown below.

Figure 7.20: Setup menu on Account page

  1. Drag the Tableau Visualization component from the Custom area of the Lightning Components list to the right-hand side of the page canvas. That should look as shown in Figure 7.21:

Figure 7.21: Dragging Tableau Visualization to Account page

  1. Configure the component by entering the Tableau visualization URL containing the desired data. Here you can use: https://public.tableau.com/views/MarketingActivityCalendar/MarketingActivityCalendar?:language=en&:display_count=y&:origin=viz_share_link
  2. Specify the Tableau field for filtering, which must be a field in the embedded visualization. Here you can type in “City”. Now, indicate the Salesforce field for filtering, which can be chosen from the qualified field names drop-down list, here choose “BillingCity”
  3. Save the page and return to the account page. The Lightning Web Component now filters the Tableau visualization automatically when the values from the two specified fields match. In the screenshot below, “BillingCity” is set to “Dallas”.

Figure 7.22: Context filtering based on account field
If you need an exceptional level of control of the experience, the Tableau Viz LWC is available on GitHub, https://github.com/tableau/tableau-viz-lwc/ , under an MIT license. This means that you can fork the component and create your own version. This is not advisable under normal circumstances, but it is good to know that it is possible should you experience unique security, performance, or compatibility requirements that cannot be addressed using the standard component.

More Details
Oct 26, 2021
Advanced use of the Tableau Viz LWC component – Integration, Authentication, and Tableau Viz LWC

The first and most important advanced use of the Tableau Viz LWC component is to add filtering. The Tableau Lightning Web Component enables two filtering techniques for Tableau visualization, which are exclusively applicable to Lightning record pages and not to Home or App pages. These approaches encompass context filtering, contingent upon the page embedding the visualization, and advanced filtering, which entails specifying corresponding fields in Tableau and Salesforce for more intricate filtering.

Context filtering

You can filter the component to the context of the current page by following the steps below:

  1. To implement context filtering, the Tableau visualization necessitates a field corresponding to the record page ID. For instance, to display a sales visualization pertaining to a specific user on their page, the Tableau visualization should encompass a field containing user record IDs.
  2. Within your Salesforce organization, choose a record page to embed the visualization (for example, Users or Opportunities).
  3. Modify the record page and configure the component by inputting the Tableau visualization URL containing the desired data. The visualization must include a field containing record IDs (for example, user or account IDs).
  4. Opt for filtering the Tableau view based on the current Salesforce record and save the alterations to the page.
  5. The component applies the filter when the record page ID matches the corresponding field value in the Tableau visualization, such as displaying only the sales data pertinent to the user on their page.
More Details
Aug 27, 2021
Configuring and using the Tableau Viz LWC component – Integration, Authentication, and Tableau Viz LWC-2

To add our demonstrator example to your Salesforce org, follow these steps:

  1. Go to the URL: https://public.tableau.com/app/profile/p.padham/viz/SuperstoreDashboard_16709573699130/SuperstoreDashboard. This is a dashboard based on the Superstore dataset often used to demonstrate Tableau capabilities and is shown in the following screenshot:

Figure 7.9: Superstore Dashboard on Tableau Public

  1. Click on the share icon and copy the public link, as shown in Figure 7.10:

Figure 7.10: Sharing public link for Superstore Dashboard

  1. Back in your developer org, go back to your Sales Home Page, click the gear icon, and select Edit Page.
  2. We will now replace the Quarterly Performance chart with the Sales Dashboard from Tableau Public. Start by clicking the delete icon on the Quarterly Performance chart, as shown below:

Figure 7.11: Deleting existing visualization

  1. Now drag the Tableau Visualization component into the empty slot and replace the URL in the component settings with the URL you copied from Tableau Public. You can see this in the following screenshot:

Figure 7.12: Configuring new Tableau Visualization component

  1. This should result in a view like the following figure:

Figure 7.13: Superstore Dashboard added

  1. We want to show a larger dashboard, so set the height to 950, save and go back to the Sales Home Page. The view should now look like the following:

Figure 7.14: Expanded view of dashboard

  1. The dashboard still cuts off on the right, so let us go back to edit mode and change the template. Click Change on the button next to the template and select the template Home Template One Region, as shown below:

Figure 7.15: Changing page template

  1. Leave the default values, click Done, save, and go back to the Sales Home Page, which should now look like the following:

Figure 7.16: Dashboard with new template

  1. The normal interactive features of the dashboard will work just fine within Salesforce, so try to click the table icon to see order details. This will change the view as per the following screenshot:

Figure 7.17: Interactive features of dashboard

  1. You can also go to a full screen view by clicking the button in the lower right corner. This is shown in the following screenshot:

Figure 7.18: Full screen view of dashboard
The process for configuring a visualization is nearly the same whether it is hosted on Tableau Public, on Tableau Online, or on your own Tableau Server. You will, however, be required to log in when accessing protected resources.

More Details
Jul 19, 2021
Configuring and using the Tableau Viz LWC component – Integration, Authentication, and Tableau Viz LWC-1

Before we start to play around with the features of the Tableau Viz component, let us check that it is set up correctly. We can do that by simply adding it to an appropriate page and referencing a default dashboard from Tableau Public.
To add the Tableau Viz component to your sales home page, follow these steps:

  1. Open the App Launcher and click on the Sales app, as shown in the Figure 7.3:

Figure 7.3: App Launcher in Salesforce

  1. Now click on the gear icon in the upper right-hand corner and select Edit Page, as shown below in Figure 7.4.

Figure 7.4: Edit Page option in Sales app

  1. From the component list on the left, drag the Tableau Visualization component to the right-hand column, as shown in the following screenshot:

Figure 7.5: Dragging Tableau Visualization components

  1. This should result in a default dashboard being loaded, as in the following screenshot:

Figure 7.6: Default dashboard loaded

  1. You can now save and activate the page by using the org default. This is shown in Figure 7.7:

Figure 7.7: Saving and activating edited page

  1. You can now go back to the Sales Home Page, which should look something like the following screenshot:

Figure 7.8: Updated Sales Home Page
It is worth noting that the Tableau Viz LWC component has limited functionality on the Salesforce side and that most of the power and versatility of the component comes from the interactivity you build in Tableau. However, bringing this into Salesforce and making it part of the end-user context as they do their day-to-day work is incredibly powerful.
In our previous example, we simply accepted the out-of-the-box visualization that is included for demonstration purposes, but we can bring in any visualization we like.
Let us pick another one to demonstrate the basic capabilities of the component. This will show you how to add any visualization from Tableau Public to your Salesforce environment, a very useful function when you are learning how to use the tools and do not always have access to a commercial version.

More Details
Jun 4, 2021
Introduction – Integration, Authentication, and Tableau Viz LWC

Introduction

This chapter will provide a comprehensive guide on integrating Tableau with Salesforce through the Tableau Viz LWC component. It will begin by walking readers through the process of installing the Tableau viz LWC component and configuring it for use in Salesforce. The chapter will then delve into advanced usage of the component, such as creating custom visualizations and modifying the component’s settings. Additionally, the chapter will cover setting up Single Sign-On (SSO) between Salesforce and Tableau to streamline the authentication process. Lastly, the chapter will highlight other ways to connect Salesforce and Tableau dashboards. Overall, this chapter will give readers a detailed understanding of how to utilize the Tableau Viz LWC component to enhance their CRM analytics in Salesforce.

Structure

The chapter covers the following topics:

  • Installing and configuring Tableau viz LWC Component
  • Configuring and using Tableau viz LWC Component
  • Advanced usage of Tableau viz LWC Component
  • Setting up Single Sign-On between Salesforce and Tableau
  • Alternative ways to connect Salesforce and Tableau dashboards

Objectives

By the end of this chapter, learners will have acquired a comprehensive set of skills and knowledge related to the integration of Tableau with Salesforce. This will include an understanding of the purpose and benefits of using the Tableau Viz LWC component for this integration. They will learn how to install and configure the Tableau Viz LWC component within Salesforce, enabling seamless integration.

Additionally, learners will gain the ability to create custom visualizations and learn how to modify the settings of the Tableau Viz LWC component for more advanced usage. The chapter will also cover the setup of SSO between Salesforce and Tableau, which is crucial for streamlining the authentication process and enhancing security measures.

Moreover, learners will explore alternative methods for connecting Salesforce and Tableau dashboards, such as direct connections and the use of third-party integration tools. Finally, they will be able to apply the knowledge gained to enhance CRM analytics in Salesforce using the Tableau Viz LWC component, thus adding significant value to their Salesforce environment.

Installing the Tableau Viz LWC component
The next few sections, will walk you through installing and configuring the Tableau Viz Lightning Web Component (LWC) in Salesforce, enabling you to embed Tableau visualizations directly within your Salesforce environment. This integration brings the analytical power of Tableau to the fingertips of Salesforce users, enriching their experience with actionable insights without leaving the Salesforce platform.
The first thing you will need to do to use Tableau visualizations within a Salesforce environment is to install the Tableau Viz LWC component from the Salesforce AppExchange. This component is the most important way to bring Tableau dashboards directly in front of Salesforce business users as they do their work.
To install the Tableau Viz component into your Salesforce Analytics DE Environment, follow these steps:

  1. Open your Analytics DE Environment and make a note of its domain, for example, testco35-dev-ed.develop.lightning.force.com.
  2. Now combine that URL with the following path /packagingSetupUI/ipLanding.app?apvId=04t5w000005diA4AAI and go to the combined URL, for example, https://testco35-dev-ed.develop.lightning.force.com/packagingSetupUI/ipLanding.app?apvId=04t5w000005diA4AAI
  3. This will bring you to the installation page as shown in the Figure 7.1:

Figure 7.1: Installation page for Tableau viz LWC component

  1. Now select Install for All Users and click Install. After this, wait until the installation is completed. This will look like the Figure 7.2:

Figure 7.2: Installation in progress page

  1. You can click Done to complete the installation.
More Details